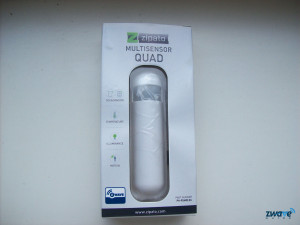
Today we are reviewing the Zipato Multisensor Quad, Zipato was kind enough to send us a model for testing purposes. We are reviewing this product based on our extensive testing during one week.
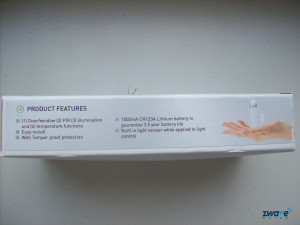
The Multisensor Quad by Zipato is a as the name implies, multi purpose sensor. It has the following features:
- [1] Door/ window [2] PIR (Passive Infrared Sensor) [3] illumination and [4] temperature functions
- Easy installation
- Tamper proof protection
- 1500mA CR123A Lithium battery to guarantee 3.5 year battery life
- built in light sensor while applied to light control
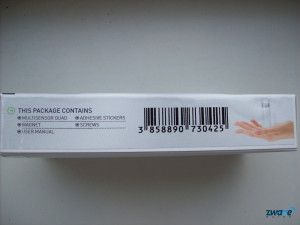
The package has the following contents:
- The Multisensor Quad device
- a magnet
- user manual
- adhesive stickers
- screws
Products photos of the packaging
Physical installation
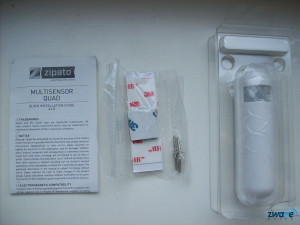
The product comes with many options for physical installation. To begin with It has quite a few sizes of 3M sticky tape, so it can be attached to a door without screwing.
There are also four screw included with the product for a more permanent installation. Attaching the product to a door seems like the most logical place for the product, because of the built in door/ window sensor.
However it is not a strict requirement. One can also place the sensor anywhere to use the three remaining sensor types: PIR, Illumination and temperature.
Photo of the physical installation options.
Inclusion and installation
As with all Z-wave products, this product needs to be included into the Z-wave network as well. We have tested the inclusion of the Zipato multisensor quad with two products: OpenHAB and the Zipato Zipabox.
First let’s have a look at the inclusion with OpenHAB. The inclusion is done by pressing the tamper button 3 times. Then include the device with your z-wave controller using the normal instructions. In our case we used the Aeon Labs z-stick 2.
After the inclusion has been done, one needs to create an item configuration for the device. We used the following parameters for the OpenHAB device configuration:
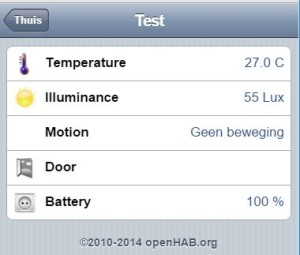
Number Door_Temperature "Temperature [%.1f C]" <temperature> (Woonkamer) {zwave="13:command=SENSOR_MULTILEVEL,sensor_type=1"}
Number Door_Illuminance "Illuminance [%.0f Lux]" <sun> (Woonkamer) {zwave="13:command=SENSOR_MULTILEVEL,sensor_type=3"}
Contact Door_Motion "Motion [MAP(motion.map):%s]" <frontdoor> (Woonkamer) {zwave="13:command=SENSOR_BINARY,sensor_type=12,respond_to_basic=true"}
Contact Door_Contact "Door [MAP(en.map):%s]" <contact> (Woonkamer) {zwave="13:command=SENSOR_BINARY,sensor_type=10,respond_to_basic=true"}
Number Door_Battery "Battery [%s %%]" <socket> (Woonkamer) {zwave="13:command=BATTERY"}
In our case we have used node number 13. After this configuration has been done, the following is reported within OpenHAB:
Screenshot of the device in OpenHAB
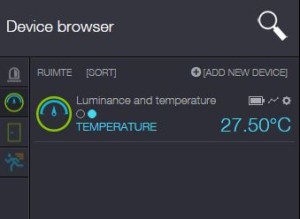
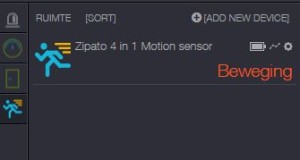
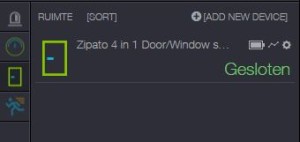
We have also added this device to the Zipabox. The first time our inclusion failed. We figured out that we need to wake up the device a couple of times during the inclusion in order to finish the synchronization process. After the device has been added to the Zipabox it reports the parameters just like OpenHAB. One difference is that the Zipabox reports the illumination in percentages instead of a raw lux level.
Here are some screenshots of the device shown in the Zipabox software:
Configuration parameters
The device has quite a lot of configuration parameters, so everything can be setup to your liking. This can however also be very challenging from time to time for the less experienced z-wave user.
One important thing to note is that the minimum wake-up time is 1800 seconds which is 30 minutes. So if you make a configuration change you will have to wait until the device wakes up. Luckily there is also a manual way to trigger a wake-up using the tamper button. This way the device will wake-up, receive the messages from the controller and then go back to sleep. The default wake-up value is 18400 seconds which is equal to 24 hours. Just be aware of this fact when you are changing parameters or setting up the device.
The two most significant parameters will be described, these are the operation mode and the multi sensor function switch. We set the operation mode to 8 so we are receiving our values in Celsius, leave this default if you don’t want to change this. And we set the multi sensor function switch to 20, so both the motion sensor and contact switch will report their own values.
All of the possible configuration parameters can be found here, in the official manual.
Battery life
The claimed battery life is 2-3 years on the CR123A battery that comes with the package. We did an exact voltage measure at the beginning of our test week, which resulted in: 3.127v
After one week of using the device our voltage rate has dropped to: 3.125v
Please note that we did some heavy testing so the claimed battery life is most likely correct.
Sensors
As said the device comes with 4 sensor built in. The illuminance is measured in Lux (OpenHAB) or percentage (Zipabox), the temperature in Fahrenheit or Celsius (configurable), the motion and door sensor are binary values (open or closed). The Zipato Multisensor Quad also reports its battery status in percentage.
Conclusion
The Zipato Multisensor Quad is a nice sensor to add to your z-wave collection. Due to it’s 4-in-1 nature it allows you to easily add all the possible parameters you need to know about your room.
Based on these parameters you can for example switch on lamps, turn off lamps etc. You basically get four sensors for the price of one sensor, which is a perfect deal.
You can buy this sensor directly by clicking the product image listed here:
[AMAZONPRODUCTS asin=”B00IA89QDQ”]

