Recently we did a review on the Shelly flood sensor. Today we will provide you with a guide to connect this awesome sensor to Home Assistant. We assume that you have an existing Home Assistant installation running with a MQTT server.
Configuring the Shelly flood sensor
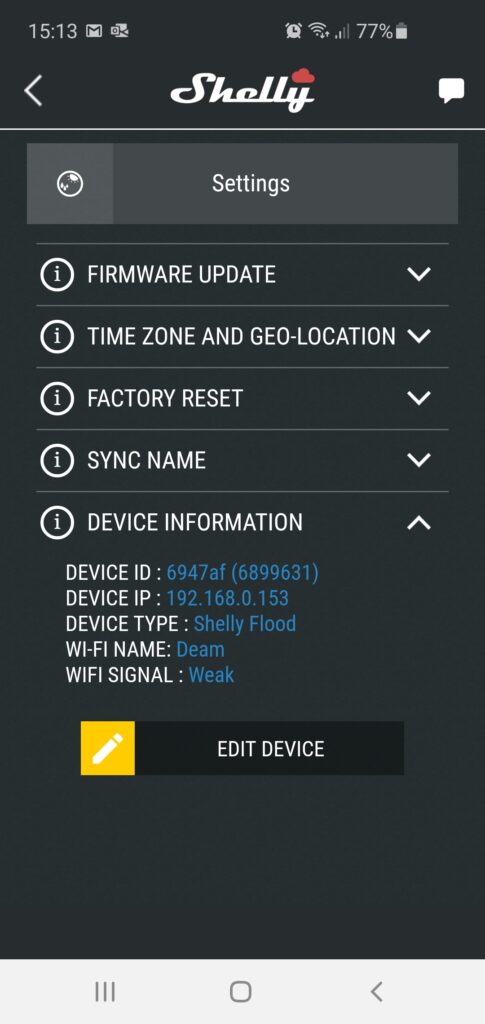
FIrst we need to change the configuration of the Shelly flood sensor. We need to do this in the web interface of the Shelly flood. Open the Shelly app and find the IP address of your Shelly flood. You can find this under the device information section.
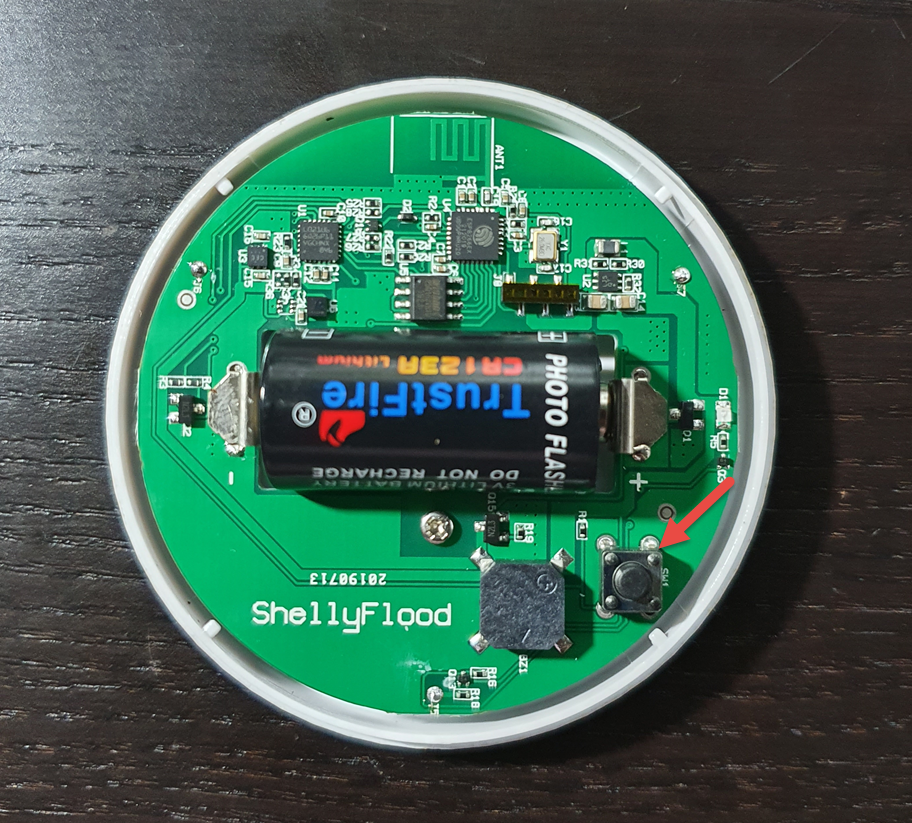
Now we need to wake up the device, as it is a battery powered device. You can wake up the sensor by pressing the setup button shortly. Open the case of the Shelly flood to find the wake up button.
After we woke up the Shelly flood we can configure the MQTT settings in order to connect our sensor to Home Assistant. You can find the MQTT settings under developer settings in the Shelly web interface.
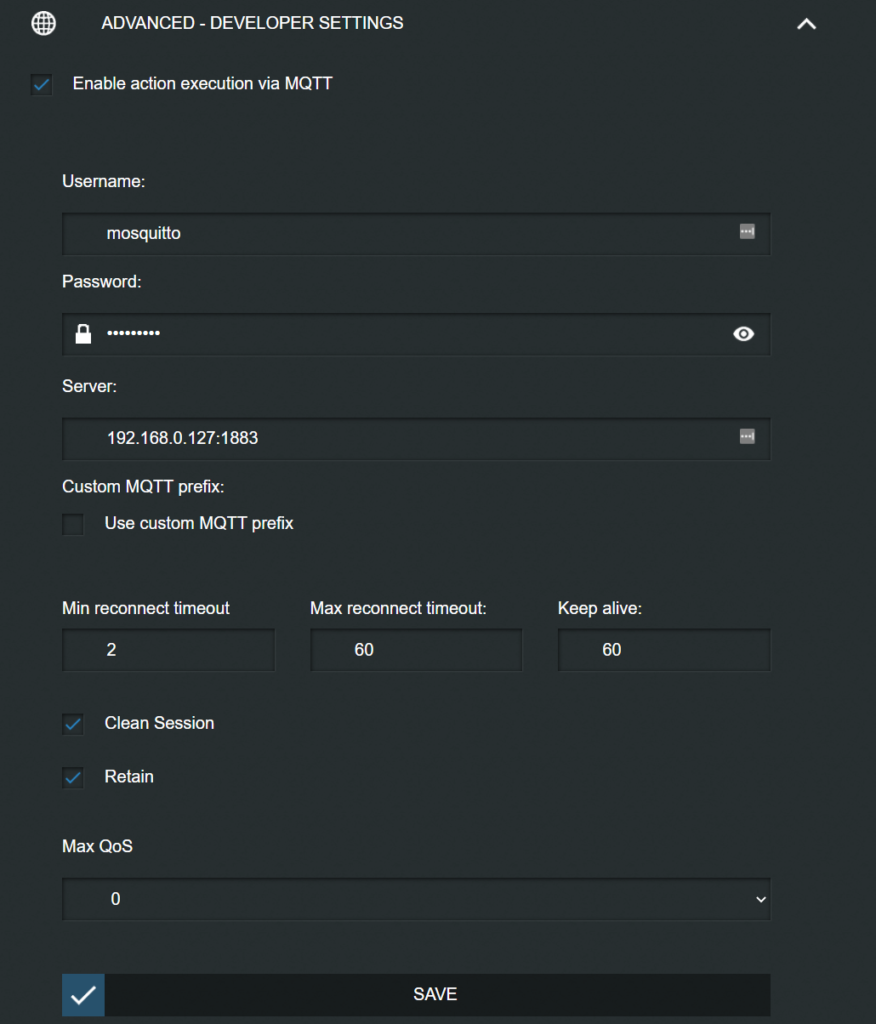
Please note that after you configure MQTT, cloud notifications will no longer work. You need to use Home Assistant in order to send out notifications.
Adding the sensor to Home Assistent configuration.yaml.
In order to use the flood sensor in the Home Assistant software you need to add it to the Home Assistent configuration.yaml file. We used the following configuration to add it to Home Assistent:
binary_sensor:
  - platform: mqtt
    name: Shelly Flood Sensor
    state_topic: "shellies/shellyflood-6947AF/sensor/flood"
    payload_on: "true"
    payload_off: "false"
    device_class: moisture
    qos: 2

sensor:
  - platform: mqtt
    name: Flood Sensor Battery
    state_topic: "shellies/shellyflood-6947AF/sensor/battery"
    unit_of_measurement: "%"
    device_class: battery
    qos: 2
  - platform: mqtt
    name: Flood Sensor Temperature
    state_topic: "shellies/shellyflood-6947AF/sensor/temperature"
    unit_of_measurement: "°F"
    icon: mdi:thermometer
    qos: 2
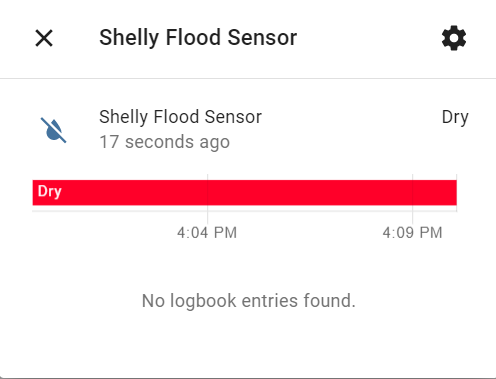
Make sure you replace “6947AF” with your own sensor ID. I used MQTT explorer in order to figure out the ID of the flood sensor. If all went well you should be seeing the sensor in the Lovelace Home Assistant UI:
Receiving notifications on your mobile phone
Having the sensor connected to your home automation system is great, but we also want to make sure we get notified once flood has been detected. To do so you need to configure an automation rule within Home Assistant. Home Assistant has split up configuration files, you can put the automation rules into automation.xml. Here is the configuration in order to add a push notification to your mobile. Make sure you change the device type accordingly:
- id: flood_alert
  alias: Flood Alert
  initial_state: 'true'
  trigger:
  - platform: state
    entity_id: binary_sensor.shelly_flood_sensor
    from: 'off'
    to: 'on'
  action:
  - service: notify.mobile_app_sm_g973f
    data:
      message: Flood Alert - Check Moisture
      title: Flood Alert